


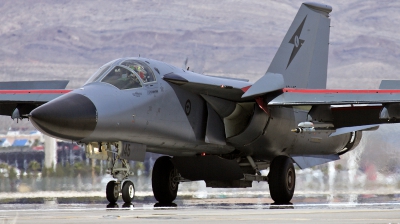
- Air Force: Australia - Air Force
- Aircraft: General Dynamics F-111C Aardvark
- Registration: A8-145 (cn D1-21)
- Views: 1850
- Location: Las Vegas - Nellis AFB (LSV / KLSV) , USA - Nevada March, 2009
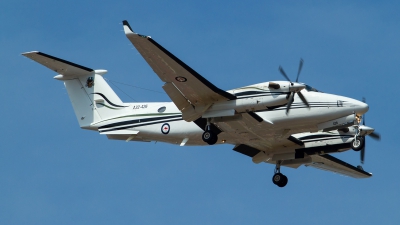
- Air Force: Australia - Air Force
- Aircraft: Beech Super King Air 350B
- Registration: A32-426 (cn FL-426)
- Views: 802
- Location: Butterworth (BWH / WMKB) , Malaysia October 16, 2014
On approach to RMAF Butterworth after a flight from Singapore whilst participating in Exercise Bersama Lima 14. Carries the 70th anniversary crest of 38 Sqn, RAAF, at the top of the vertical tailfin.
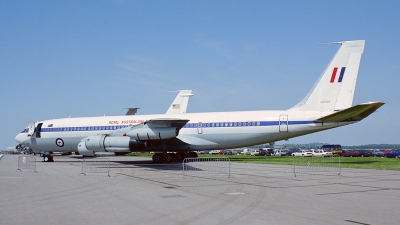
- Air Force: Australia - Air Force
- Aircraft: Boeing 707-338C
- Registration: A20-623 (cn 19628/671)
- Views: 1041
- Location: Boscombe Down (EGDM) , UK - England June 14, 1992
- Views: 937
- Location: Boscombe Down (EGDM) , UK - England June 14, 1992
37 Squadron
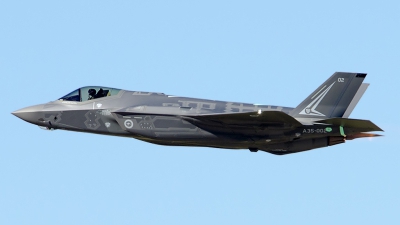
- Air Force: Australia - Air Force
- Aircraft: Lockheed Martin F-35A Lightning II
- Registration: A35-002 (cn AU-02) Aircraft Info
- Views: 3154
- Location: Fort Worth - NAS JRB / Carswell Field (AFB) (NFW / KFWH) , USA - Texas October 17, 2014
The second F-35A for the Royal Australian Air Force departs NAS Ft. Worth on test flight #2.
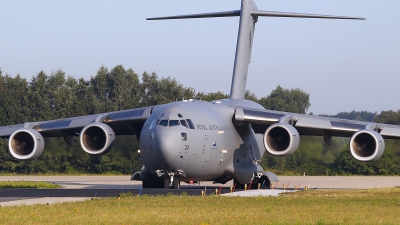
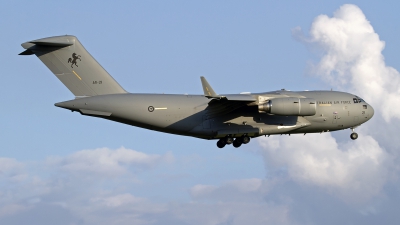
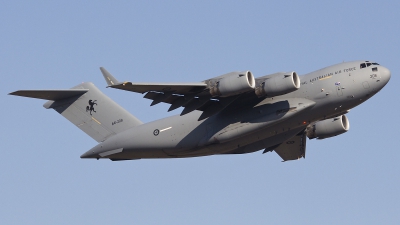
- Air Force: Australia - Air Force
- Aircraft: Boeing C-17A Globemaster III
- Registration: A41-208 (cn F183/AUS3) Aircraft Info
- Views: 1004
- Location: Eindhoven (- Welschap) (EIN / EHEH) , Netherlands October 14, 2014
36sqn
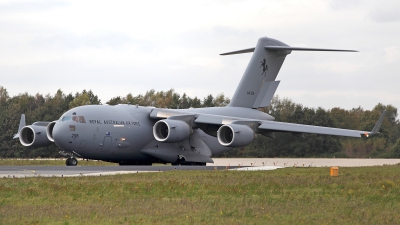
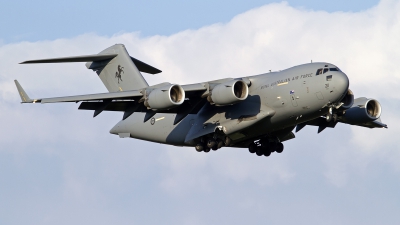
- Air Force: Australia - Air Force
- Aircraft: Boeing C-17A Globemaster III
- Registration: A41-211 (cn F251/AUS6) Aircraft Info
- Views: 880
- Location: Eindhoven (- Welschap) (EIN / EHEH) , Netherlands August 8, 2014
Arriving at Eindhoven under heavy rain. The parking building at Eindhoven offers great photo opportunities but be aware: Please refrain from taking pictures which include military infrastructure, buildings and sensitive military equipment!

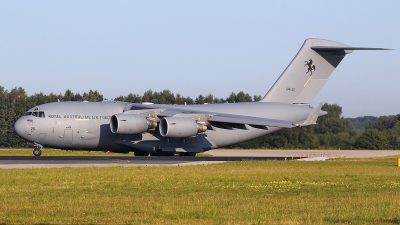
- Air Force: Australia - Air Force
- Aircraft: Boeing C-17A Globemaster III
- Registration: A41-210 (cn F239/AUS5) Aircraft Info
- Views: 891
- Location: Eindhoven (- Welschap) (EIN / EHEH) , Netherlands September 8, 2014
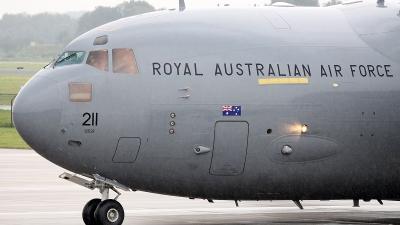
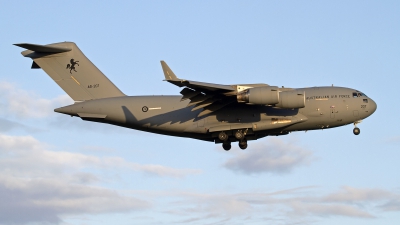
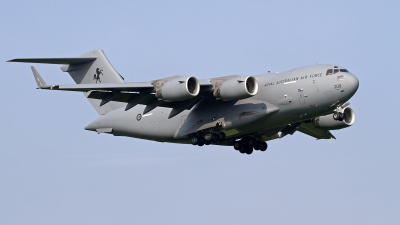
- Air Force: Australia - Air Force
- Aircraft: Boeing C-17A Globemaster III
- Registration: A41-210 (cn F239/AUS5) Aircraft Info
- Views: 1026
- Location: Eindhoven (- Welschap) (EIN / EHEH) , Netherlands September 8, 2014
nice visitor from 36 Sqn. RAAF, Base Amberley, Queensland, Australia
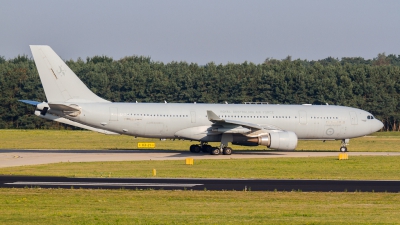
- Air Force: Australia - Air Force
- Aircraft: Airbus KC-30A (A330-203MRTT)
- Registration: A39-002 (cn 951/MRTT002)
- Views: 1115
- Location: Eindhoven (- Welschap) (EIN / EHEH) , Netherlands July 31, 2014
Tdy for Operation 'Bring them home'.
- Air Force: Australia - Air Force
- Aircraft: Boeing C-17A Globemaster III
- Registration: A41-209 (cn F184/AUS4) Aircraft Info
- Views: 930
- Location: Eindhoven (- Welschap) (EIN / EHEH) , Netherlands July 31, 2014
Take off from Eindhoven. Rare visitor, far away from home.
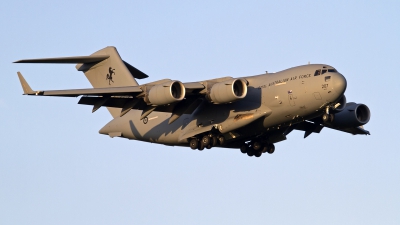
- Air Force: Australia - Air Force
- Aircraft: Boeing C-17A Globemaster III
- Registration: A41-211 (cn F251/AUS6) Aircraft Info
- Views: 1095
- Location: Eindhoven (- Welschap) (EIN / EHEH) , Netherlands August 5, 2014
- Air Force: Australia - Air Force
- Aircraft: Boeing C-17A Globemaster III
- Registration: A41-211 (cn F251/AUS6) Aircraft Info
- Views: 1031
- Location: Eindhoven (- Welschap) (EIN / EHEH) , Netherlands August 5, 2014
- Air Force: Australia - Air Force
- Aircraft: Boeing C-17A Globemaster III
- Registration: A41-211 (cn F251/AUS6) Aircraft Info
- Views: 809
- Location: Eindhoven (- Welschap) (EIN / EHEH) , Netherlands August 13, 2014
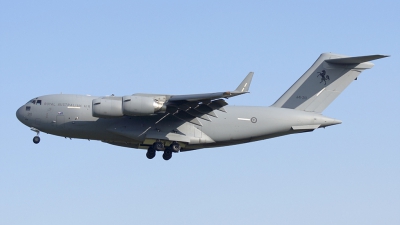
- Air Force: Australia - Air Force
- Aircraft: Boeing C-17A Globemaster III
- Registration: A41-211 (cn F251/AUS6) Aircraft Info
- Views: 943
- Location: Eindhoven (- Welschap) (EIN / EHEH) , Netherlands August 13, 2014
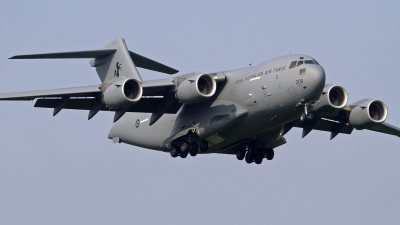
- Air Force: Australia - Air Force
- Aircraft: Boeing C-17A Globemaster III
- Registration: A41-207 (cn F173/AUS2) Aircraft Info
- Views: 1021
- Location: Eindhoven (- Welschap) (EIN / EHEH) , Netherlands August 11, 2014
"ASY635" returns to its temporary homebase Eindhoven after another succesfull mission to Kharkov.
- Air Force: Australia - Air Force
- Aircraft: Boeing C-17A Globemaster III
- Registration: A41-207 (cn F173/AUS2) Aircraft Info
- Views: 917
- Location: Eindhoven (- Welschap) (EIN / EHEH) , Netherlands August 11, 2014
"ASY635" returns to its temporary homebase Eindhoven after another succesfull mission to Kharkov.
- Air Force: Australia - Air Force
- Aircraft: Boeing C-17A Globemaster III
- Registration: A41-208 (cn F183/AUS3) Aircraft Info
- Views: 1077
- Location: Madrid - Getafe (LEGT) , Spain July 31, 2014
- Air Force: Australia - Air Force
- Aircraft: Boeing C-17A Globemaster III
- Registration: A41-209 (cn F184/AUS4) Aircraft Info
- Views: 833
- Location: Eindhoven (- Welschap) (EIN / EHEH) , Netherlands July 22, 2014
The first RAAF aircraft arrives at Eindhoven AB in support of Operation Bring Them Home
- Air Force: Australia - Air Force
- Aircraft: Boeing C-17A Globemaster III
- Registration: A41-209 (cn F184/AUS4) Aircraft Info
- Views: 952
- Location: Eindhoven (- Welschap) (EIN / EHEH) , Netherlands July 22, 2014
The first RAAF aircraft arrives at Eindhoven AB in support of Operation Bring Them Home
- Air Force: Australia - Air Force
- Aircraft: Boeing C-17A Globemaster III
- Registration: A41-207 (cn F173/AUS2) Aircraft Info
- Views: 1203
- Location: Eindhoven (- Welschap) (EIN / EHEH) , Netherlands August 1, 2014
This is the third RAAF C-17 that lands at Eindhoven Airbase in support of Operation Bring Them Home, The aircraft involved in this operation are transporting the victims of MH17 to Eindhoven AB.

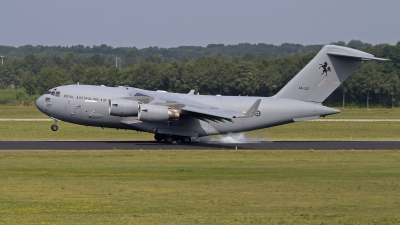
- Air Force: Australia - Air Force
- Aircraft: Boeing C-17A Globemaster III
- Registration: A41-207 (cn F173/AUS2) Aircraft Info
- Views: 1098
- Location: Eindhoven (- Welschap) (EIN / EHEH) , Netherlands August 3, 2014
"AUSSIE 635" Leaving Eindhoven for Kharkov.
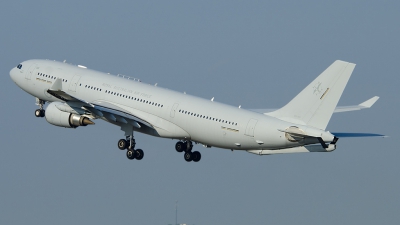
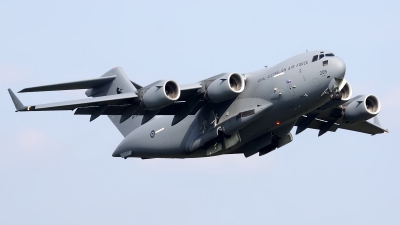
- Air Force: Australia - Air Force
- Aircraft: Airbus KC-30A (A330-203MRTT)
- Registration: A39-003 (cn 969/MRTT003)
- Views: 1013
- Location: Fort Worth - Alliance (AFW / KAFW) , USA - Texas June 1, 2014
Rare catch in Ft. Worth as this Royal Australian Air Force KC-30A departs for Andrews AFB.
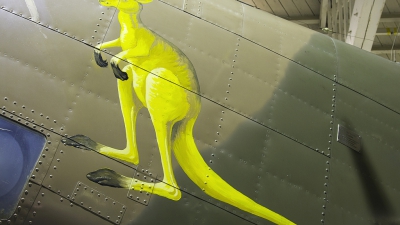
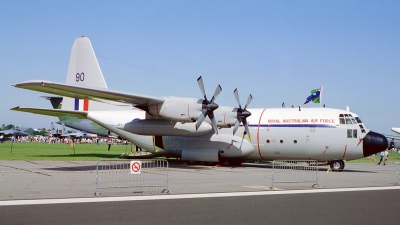
- Views: 1375
- Location: Hendon , UK - England December 12, 2013
This Hudson was intended as FH174 for the RAF but was diverted and arrived in Australia during April 1942 and, subsequently, during the defence of Australia she is credited with two japanese kills. Now on display at the RAF Museum Hendon.