


- Views: 742
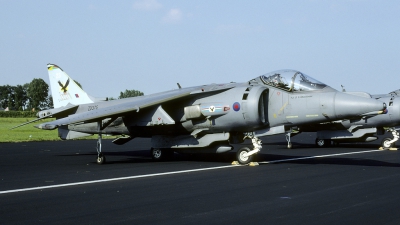
- Location: Zeltweg (LOXZ) , Austria July 1, 2000
- Views: 1237
- Location: Koksijde (EBFN) , Belgium July 3, 2004
Koksijde airday
- Views: 1233
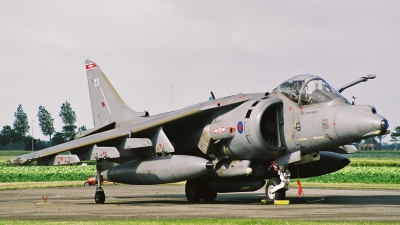
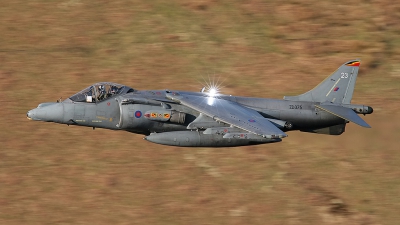
- Location: Leeuwarden (LWR / EHLW) , Netherlands July 5, 2001
20(R) Sq visitor to the 2001 open house at Leeuwarden.

- Air Force: UK - Air Force
- Aircraft: British Aerospace Harrier GR.9
- Registration: ZD375 / 23 (cn P23) Aircraft Info
- Views: 1205
- Location: Off-Airport - Cumbria , UK - England April 23, 2010
- Air Force: UK - Air Force
- Aircraft: British Aerospace Harrier GR.9
- Registration: ZD375 / 23 (cn P23) Aircraft Info
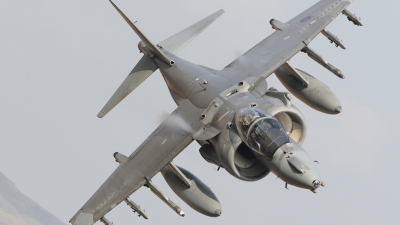
- Views: 1538
- Location: Havelock - Cherry Point MCAS (NKT / KNKT) , USA - North Carolina May 5, 1996
- Air Force: UK - Air Force
- Aircraft: British Aerospace Harrier GR.9
- Registration: ZD375 / 23 (cn P23) Aircraft Info
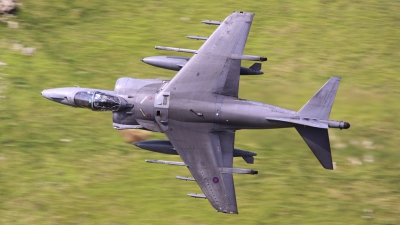
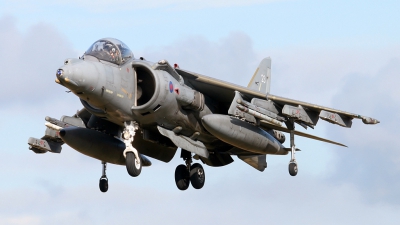
- Views: 2907
- Location: Off-Airport - Machynlleth Loop Area , UK - Wales April 12, 2010
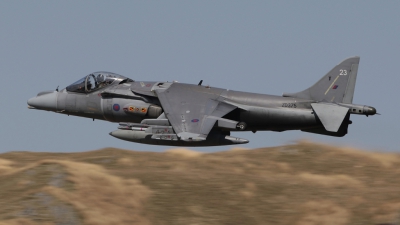
- Air Force: UK - Air Force
- Aircraft: British Aerospace Harrier GR.9
- Registration: ZD375 / 23 (cn P23) Aircraft Info
- Views: 1616
- Location: Off-Airport - Machynlleth Loop Area , UK - Wales April 22, 2010

- Air Force: UK - Air Force
- Aircraft: British Aerospace Harrier GR.9
- Registration: ZD375 / 23 (cn P23) Aircraft Info
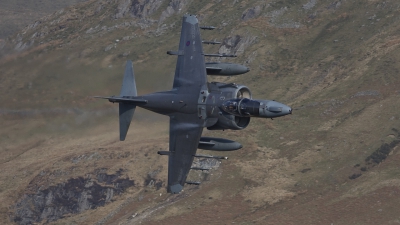
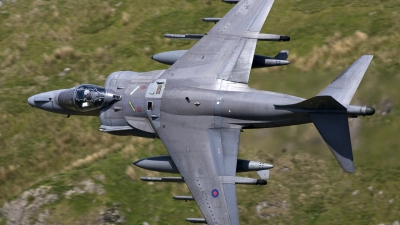
- Views: 2667
- Location: Off-Airport - Machynlleth Loop Area , UK - Wales April 12, 2010
- Air Force: UK - Air Force
- Aircraft: British Aerospace Harrier GR.9
- Registration: ZD375 / 23 (cn P23) Aircraft Info
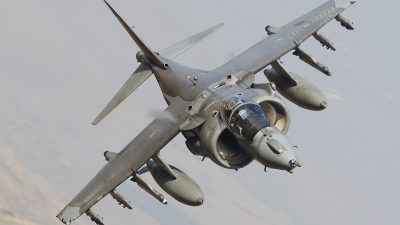
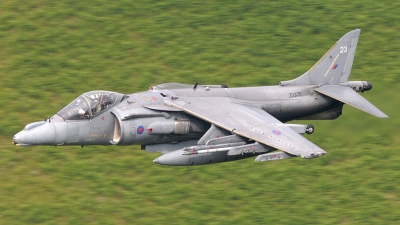
- Views: 4229
- Location: Off-Airport - Machynlleth Loop Area , UK - Wales April 12, 2010
RAF Harrier GR9 still wearing 4 SQN markings dives in to the pass
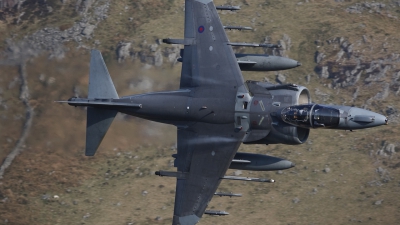
- Air Force: UK - Air Force
- Aircraft: British Aerospace Harrier GR.9
- Registration: ZD375 / 23 (cn P23) Aircraft Info
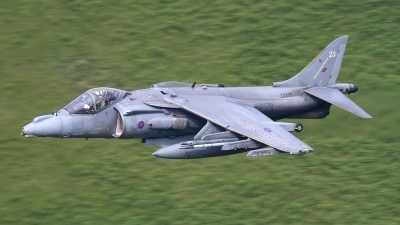
- Views: 1531
- Location: Off-Airport - Machynlleth Loop Area , UK - Wales April 12, 2010
Approaching the Cad West pass in LFA-7
- Air Force: UK - Air Force
- Aircraft: British Aerospace Harrier GR.9
- Registration: ZD375 / 23 (cn P23) Aircraft Info
- Views: 1446
- Location: Off-Airport - Machynlleth Loop Area , UK - Wales April 12, 2010
Approaching the Cad West pass in LFA-7
- Air Force: UK - Air Force
- Aircraft: British Aerospace Harrier GR.9
- Registration: ZD375 / 23 (cn P23) Aircraft Info
- Views: 1422
- Location: Off-Airport - Machynlleth Loop Area , UK - Wales June 2, 2009
Part of a "Ninja" flight seen on a low level sortie through LFA7

- Air Force: UK - Air Force
- Aircraft: British Aerospace Harrier GR.9
- Registration: ZD375 / 23 (cn P23) Aircraft Info
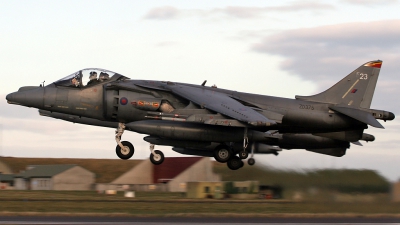
- Views: 1172
- Location: Cottesmore (Oakham) (OKH / EGXJ) , UK - England June 19, 2009
Landing at Cottesmore.
- Air Force: UK - Air Force
- Aircraft: British Aerospace Harrier GR.9
- Registration: ZD375 / 23 (cn P23) Aircraft Info
- Views: 1589
- Location: Off-Airport - Machynlleth Loop Area , UK - Wales June 25, 2009
- Air Force: UK - Air Force
- Aircraft: British Aerospace Harrier GR.9
- Registration: ZD375 / 23 (cn P23) Aircraft Info
- Views: 1328
- Location: Off-Airport - Machynlleth Loop Area , UK - Wales June 27, 2009
- Air Force: UK - Air Force
- Aircraft: British Aerospace Harrier GR.9
- Registration: ZD375 / 23 (cn P23) Aircraft Info
- Views: 1819
- Location: Off-Airport - Machynlleth Loop Area , UK - Wales June 2, 2009
- Air Force: UK - Air Force
- Aircraft: British Aerospace Harrier GR.9
- Registration: ZD375 / 23 (cn P23) Aircraft Info
- Views: 1479
- Location: Cottesmore (Oakham) (OKH / EGXJ) , UK - England October 17, 2008
Low over the Cottesmore approach.
- Air Force: UK - Air Force
- Aircraft: British Aerospace Harrier GR.9
- Registration: ZD375 / 23 (cn P23) Aircraft Info
- Views: 1898
- Location: Off-Airport - Machynlleth Loop Area , UK - Wales April 16, 2008
"Spider 2" caught through the Loop in perfect light at the end of the day with the stobe in full effect, part of a flight of three with only Spider 2 and 3 coming through the pass.
- Air Force: UK - Air Force
- Aircraft: British Aerospace Harrier GR.9
- Registration: ZD375 / 23 (cn P23) Aircraft Info
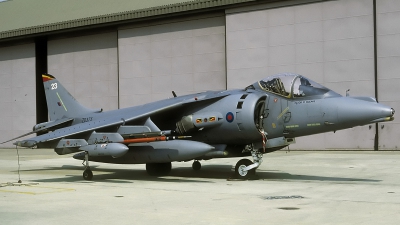
- Views: 1511
- Location: Kinloss (FSS / EGQK) , UK - Scotland November 23, 2007

- Air Force: UK - Air Force
- Aircraft: British Aerospace Harrier GR.9
- Registration: ZD375 / 23 (cn P23) Aircraft Info
- Views: 1418
- Location: Luqa - Malta International (MLA / LMML) , Malta July 20, 2007