


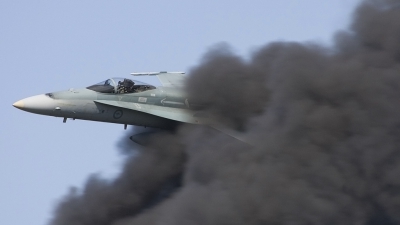
- Air Force: Australia - Air Force
- Aircraft: McDonnell Douglas F/A-18A Hornet
- Registration: A21-8 (cn 306/AF8) Aircraft Info
- Views: 1814
- Location: Amberley (YAMB) , Australia - Queensland November 9, 2008
This Alpha model Hornet came screaming from behind the smoke cloud after a simulated ground attack run. A great display by the four ship team. Amberley Airshow 2008. [1D2+100-400L]
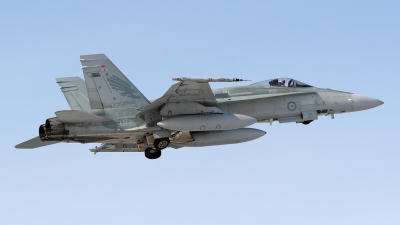
- Air Force: Australia - Air Force
- Aircraft: McDonnell Douglas F/A-18A Hornet
- Registration: A21-21 (cn 470/AF21) Aircraft Info
- Views: 1725
- Location: Fairbanks - Eielson AFB (EIL / PAEI) , USA - Alaska April 9, 2008
RAAF Hornet gets airborne from Eielson AFB at the start of a Red Flag Alaska 08-2 mission.
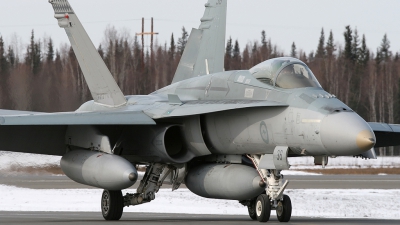
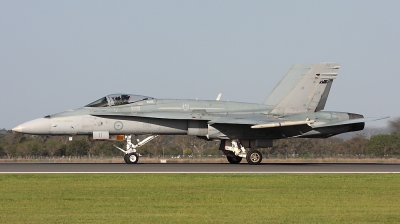
- Air Force: Australia - Air Force
- Aircraft: McDonnell Douglas F/A-18A Hornet
- Registration: A21-36 (cn 0595/AF036) Aircraft Info
- Views: 1771
- Location: Fairbanks - Eielson AFB (EIL / PAEI) , USA - Alaska April 9, 2008
RAAF Hornet taxies in at the end of a Red Flag Alaska 08-2 mission.
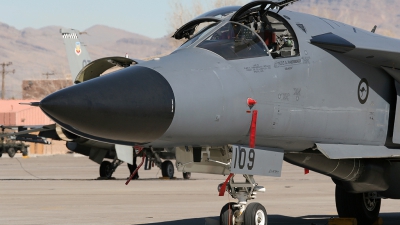
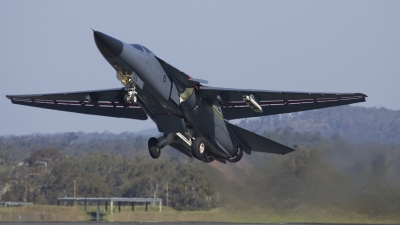
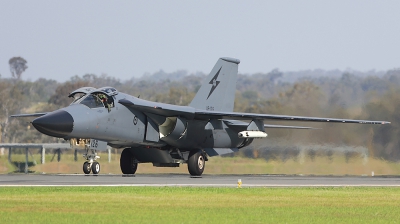
- Air Force: Australia - Air Force
- Aircraft: General Dynamics F-111C Aardvark
- Registration: A8-109 (cn A1-154)
- Views: 2303
- Location: Las Vegas - Nellis AFB (LSV / KLSV) , USA - Nevada February 15, 2007
Up close and personal with this stunning example of an RAAF F-111C from No 1 Sqn. My sincere thanks go to everyone who made this shot possible.
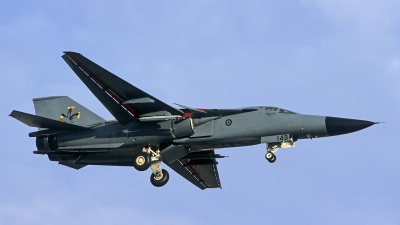
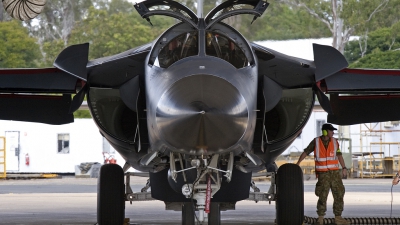
- Air Force: Australia - Air Force
- Aircraft: General Dynamics F-111C Aardvark
- Registration: A8-129 (cn D1-05)
- Views: 2462
- Location: Las Vegas - Nellis AFB (LSV / KLSV) , USA - Nevada February 15, 2007
Never in my wildest dreams did I think I'd get the chance to stand on the ramp with the F-111s of 1 Sqn RAAF as they prepared for another Red Flag 07-2 mission. My sincere thanks go to everyone who made this shot possible.
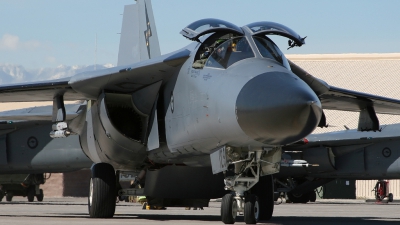
- Air Force: Australia - Air Force
- Aircraft: General Dynamics RF-111C Aardvark
- Registration: A8-143 (cn D1-19)
- Views: 2843
- Location: Las Vegas - Nellis AFB (LSV / KLSV) , USA - Nevada September 4, 2002
1 Sqn, 82 Wg
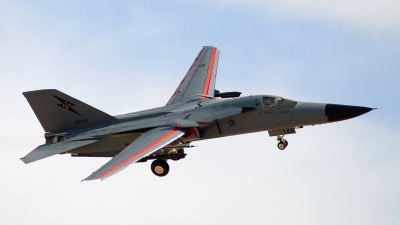
- Air Force: Australia - Air Force
- Aircraft: General Dynamics F-111C Aardvark
- Registration: A8-148 (cn D1-24)
- Views: 2671
- Location: Las Vegas - Nellis AFB (LSV / KLSV) , USA - Nevada February 12, 2007
1 Sqn, 82 Wg
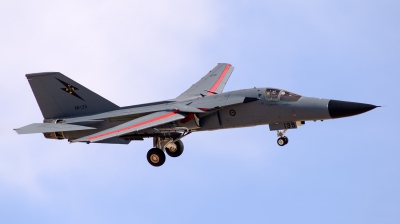
- Air Force: Australia - Air Force
- Aircraft: General Dynamics F-111C Aardvark
- Registration: A8-135 (cn D1-11)
- Views: 2240
- Location: Las Vegas - Nellis AFB (LSV / KLSV) , USA - Nevada February 12, 2007
1 Sqn, 82 Wg.
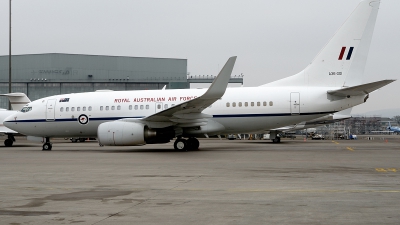
- Air Force: Australia - Air Force
- Aircraft: Boeing 737-7DT BBJ
- Registration: A36-001 (cn 30829/738)
- Views: 1453
- Location: Zurich (- Kloten) (ZRH / LSZH) , Switzerland January 30, 2009
- Air Force: Australia - Air Force
- Aircraft: General Dynamics RF-111C Aardvark
- Registration: A8-126 (cn D1-02)
- Views: 2469
- Location: Amberley (YAMB) , Australia - Queensland December 16, 2008
Feel the heat!!!

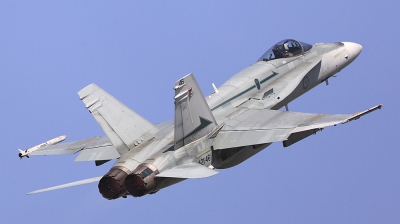
- Air Force: Australia - Air Force
- Aircraft: McDonnell Douglas F/A-18A Hornet
- Registration: A21-11 (cn 334/AF11) Aircraft Info
- Views: 1537
- Location: Amberley (YAMB) , Australia - Queensland October 5, 2008
Hornet A21-11 burns its way off Amberley's main runway for the very impressive solo display.
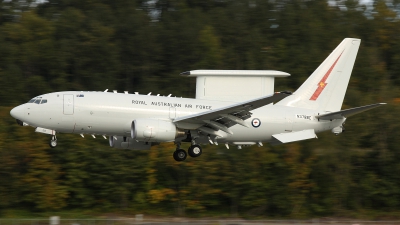
- Air Force: Australia - Air Force
- Aircraft: Boeing E-7A Wedgetail (737-7ES)
- Registration: N378BC (cn 33474/1245)
- Views: 2472
- Location: Seattle - Boeing Field / King County Int. (BFI / KBFI) , USA - Washington October 11, 2008
RAAF Wedgetail arrives back at BFI after a test flight as BOEING 201
- Air Force: Australia - Air Force
- Aircraft: General Dynamics F-111C Aardvark
- Registration: A8-148 (cn D1-24)
- Views: 4260
- Location: Amberley (YAMB) , Australia - Queensland April 4, 2007
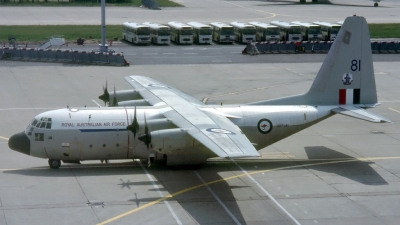
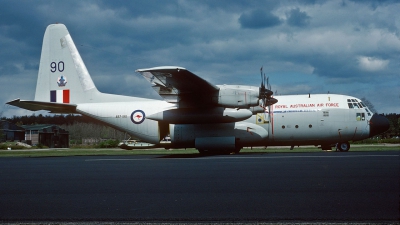
- Air Force: Australia - Air Force
- Aircraft: Lockheed C-130E Hercules (L-382)
- Registration: A97-181 (cn 382-4181)
- Views: 2066
- Location: Paris - Orly (ORY / LFPO) , France May 29, 1985

- Views: 2421
- Location: Amberley (YAMB) , Australia - Queensland October 5, 2008
one helicopter of the Navy Squirrel Display Team.
- Air Force: Australia - Air Force
- Aircraft: McDonnell Douglas F/A-18A Hornet
- Registration: A21-11 (cn 334/AF11) Aircraft Info
- Views: 2126
- Location: Amberley (YAMB) , Australia - Queensland October 4, 2008
The display pilot is waving back to the crowd while taxiing back.

- Air Force: Australia - Air Force
- Aircraft: McDonnell Douglas F/A-18A Hornet
- Registration: A21-8 (cn 306/AF8) Aircraft Info
- Views: 1761
- Location: Amberley (YAMB) , Australia - Queensland October 4, 2008
75 Sqn. markings
- Air Force: Australia - Air Force
- Aircraft: McDonnell Douglas F/A-18A Hornet
- Registration: A21-55 / 55 (cn 814/AF55) Aircraft Info
- Views: 1530
- Location: Amberley (YAMB) , Australia - Queensland October 4, 2008
3 Sqn. markings
- Air Force: Australia - Air Force
- Aircraft: General Dynamics RF-111C Aardvark
- Registration: A8-126 (cn D1-02)
- Views: 2720
- Location: Amberley (YAMB) , Australia - Queensland October 5, 2008
The dumped fuel is just about to ignite after the touch-and-go of the "Pig".
- Air Force: Australia - Air Force
- Aircraft: General Dynamics RF-111C Aardvark
- Registration: A8-126 (cn D1-02)
- Views: 3350
- Location: Amberley (YAMB) , Australia - Queensland October 4, 2008

- Air Force: Australia - Air Force
- Aircraft: McDonnell Douglas F/A-18A Hornet
- Registration: A21-11 (cn 334/AF11) Aircraft Info
- Views: 2648
- Location: Amberley (YAMB) , Australia - Queensland October 5, 2008
Dirty pass of the RAAF Hornet solo dipslay.
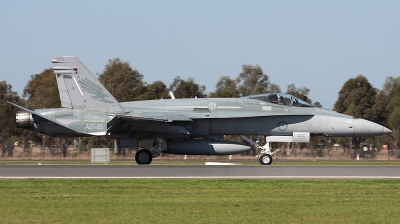
- Air Force: Australia - Air Force
- Aircraft: McDonnell Douglas F/A-18A Hornet
- Registration: A21-46 (cn 729/AF46) Aircraft Info
- Views: 2790
- Location: Amberley (YAMB) , Australia - Queensland October 4, 2008
looking good in 77 Sqn. markings.
- Air Force: Australia - Air Force
- Aircraft: Lockheed C-130E Hercules (L-382)
- Registration: A97-190 (cn 382-4190)
- Views: 1309
- Location: Utrecht - Soesterberg (UTC / EHSB) , Netherlands April 29, 1985
of 37 sqn, a long way from home!
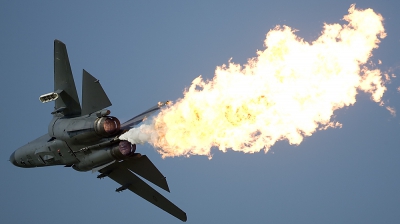
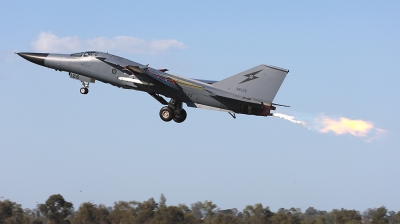
- Air Force: Australia - Air Force
- Aircraft: General Dynamics RF-111C Aardvark
- Registration: A8-126 (cn D1-02)
- Views: 10626
- Location: Amberley (YAMB) , Australia - Queensland October 5, 2008
With the last remaining F-111s leaving the RAAF within the next two years, the famous dump-and-burn manoeuvre will also soon become history. What a shame, as this is a really thrilling sight!