In Parts 1 and 2 I respectively gave an explanatory narrative about aviation art in general and perspective for the artist. In this third and last part the process to produce digital art is the center of focus. I guess that most visitors and members of this website are photographers and are familiar with the most widely-known photo processing and image manipulation software: Adobe Photoshop. For the purpose of this article, I produced a step-by-step image, showing the way I go about it. One must remember there are several different ways to reach the same result. Using Photoshop 8.0 CS and 9.0 CS2, I taught myself on screen, hardly using that depressing thick book that accompanies the programme. For those who love to get a crack at it, the step-by-step narrative follows below. It's all done with a mouse. I left the Wacom tablet alone.
Step 1
Get yourself a high resolution photo of an aircraft. In this case the Fairchild A-10, photographed not by me but by Andy Sheppard, is used. Size DIN A3 at 300 dpi is adequate. This particular image is easy to work with since the background is almost of a monotone nature. Lots of blue, also to much blue in the A-10 itself. The aircraft, however, does not possess enough colour and contrast. I test if the background can be selected with the 'magic wand' tool. It does but the edges of the aircraft are a bit too rough.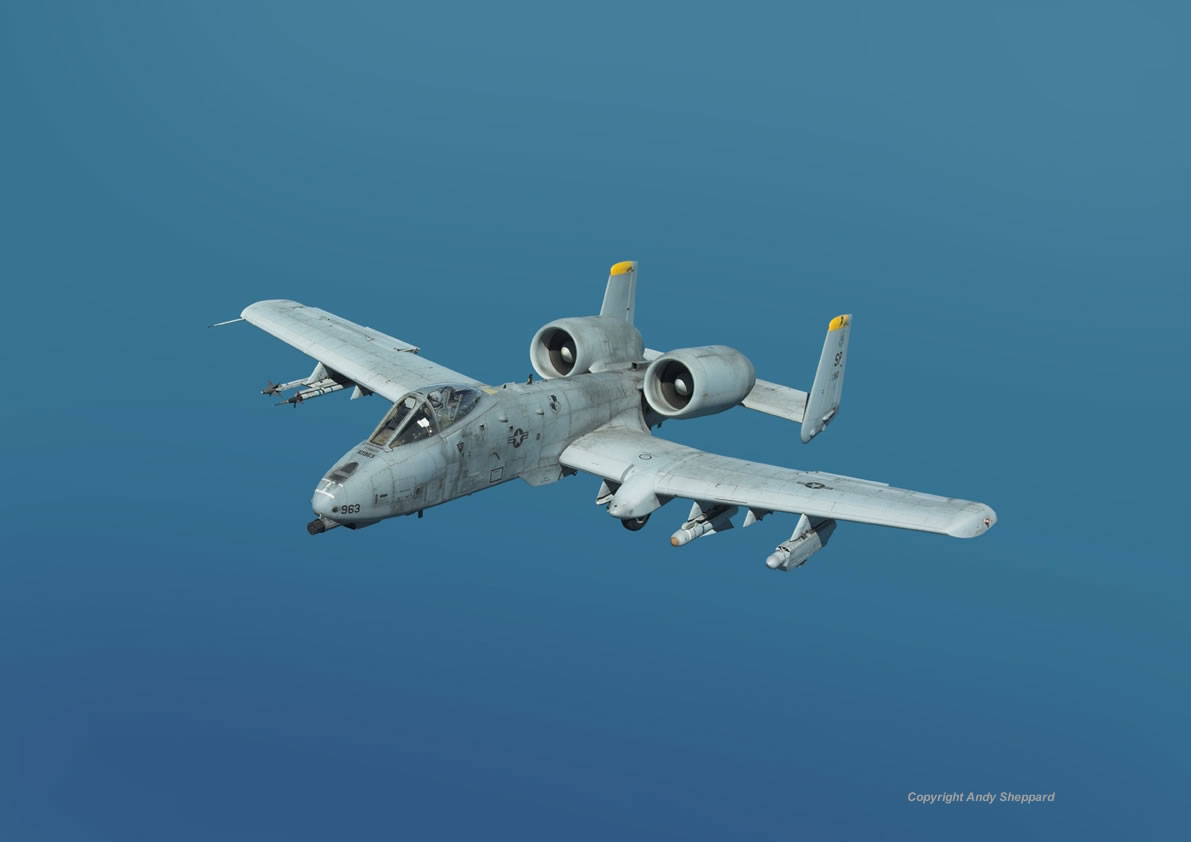
Step 2
So, I decide to produce my own mask around the A-10, using a monotone colour not present in the aircraft. Nine out of ten times this would be the colour red, based on my old days when I had to physically cut red Ulano film around a subject in a photo, in order to separate it from its backdrop. In this case I use 2px to 10px thick 'line tools' and draw them next to the plane's edges. Remember, each line tool is a layer. So every now and then I 'flatten the image'. For other little intricate contour parts I use the 'brush tool'. Set with a hard edge, at 100% opacity/100% flow and varying diameters between 3 and 19px. I go over all parts of the A/10's edges and make sure the red contour is absolutely closed. Then I select the rest of the blue background with the 'magic wand' and fill it up with the same red, using the 'paint bucket'. It requires two clicks to really fill it up, including the boundary between my red contour and the rest of the background. The red mask is finished. It has been a time-consuming process but a good preparation delivers the finest end result...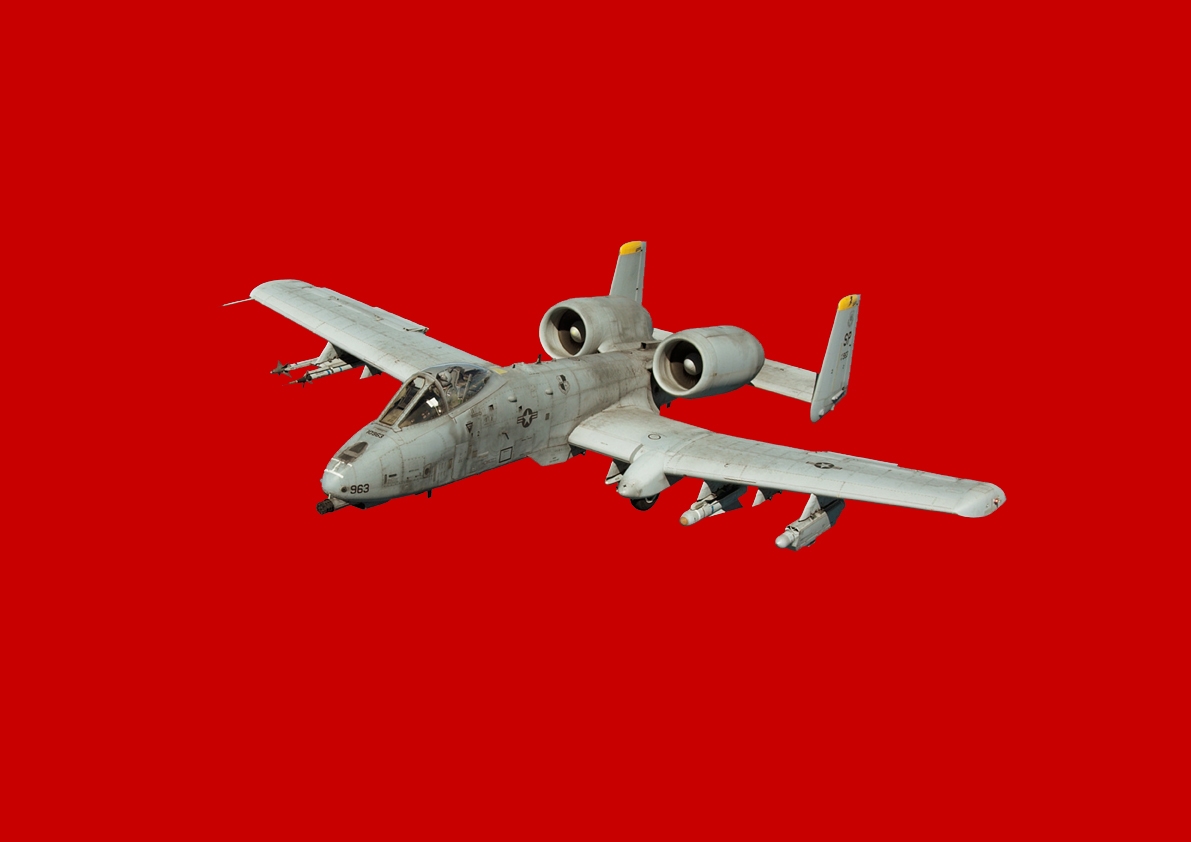
Step 3
I select the mask with 'magic wand', go to 'select' and 'inverse', inverting the selection. Now the A-10 is the working area. I go back and forth between 'curves' in all channels, 'photo filter' and 'selective colour' working all scales in each channel, 'warming up' the colours, getting rid of the excess blue in the plane and trying to produce more contrast between the darks and lights. I work with a bit of 'shadow/highlight' (not too much because this distorts the image) and 'brightness/contrast' to add some more contrast and 3D effect. We're looking for dramatics, aren't we. That's why I 'alienate' the bird a bit on purpose. I then 'hand-paint' a very dark brownish-grey, black and a self-made warm white on the aircraft's surfaces, using 'brush tool' set with a soft edge, 25% opacity/25% flow and diameters varying between 21 and 100px. Finally one more time all those filters described above are used, especially moving the scales back and forth in the 'shadow/highlight' and 'brightness/contrast' filters.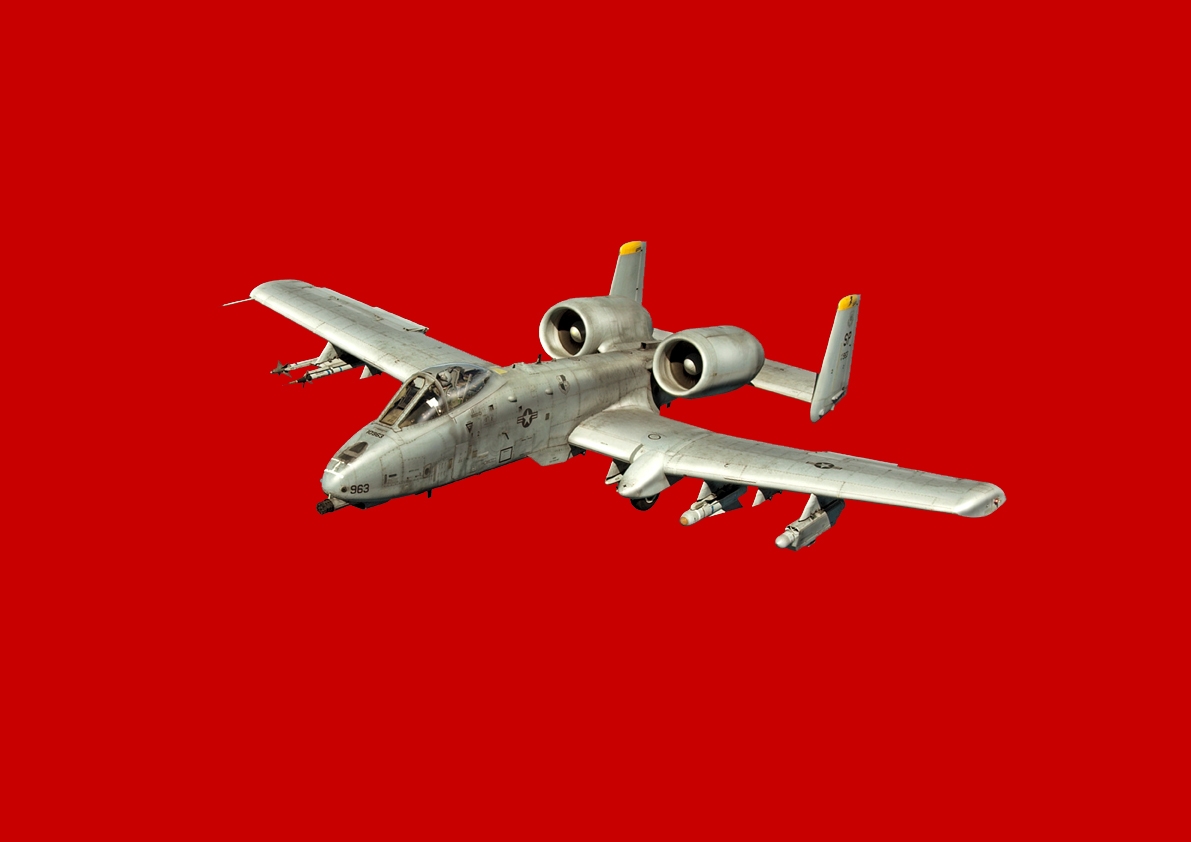
Step 4
More or less satisfied with the initial effect, I drag the A-10 onto a new transparent layer. At this stage I'm not filtering colours and lighting anymore. That will happen again when I have dragged the plane into the desired background. I check every part of the plane's contours. When residue pixels are there, I wipe them out with a tiny 'eraser tool' set at 50% opacity/50% flow. I'm really zoomed in right now. Edges that are too hard I soften up by drawing a 'lasso tool' and using 'blur more' about three times or a one-time 'gaussian blur' with the scale set at 1 px.
Step 5
Now I drag this modified A-10 onto yet another new transparent layer. This time I go to 'motion blur', set it at 100px in the desired angle (i.e. the flying direction). I select the transparent layer underneath the 100px moving aircraft, drag the non-moving A-10 in again, use 'motion blur' again but this time set at 250px scale. I do some erasing in the 100px moving Hog on top and 'merge layers'. Yet again I do some erasing and additional blurring. A fast-moving and vague A-10 is the result.
Step 6
And, yet again I drag the non-moving A-10 into the moving Hog layer, this time on top of it. I soften up the boundaries between the Hog on top and the moving one below it. This I do by lassoeing and blurring out some edges, especially the trailing edges of wings, engines and tails of the top plane. To really make the whole thing blend together I use a bit 'eraser tool' in those trailing edges of the A-10 on top, set at 25% opacity/25% flow. Again I 'merge layers'. The result is a sharp A-10 dragging some motion effect behind it. I know, the Warthog is not a fast plane (it's airspeed indicator is a calendar...) but I envisage a low flying, terrain hugging situation where you will have a sense of speed, even in an A-10...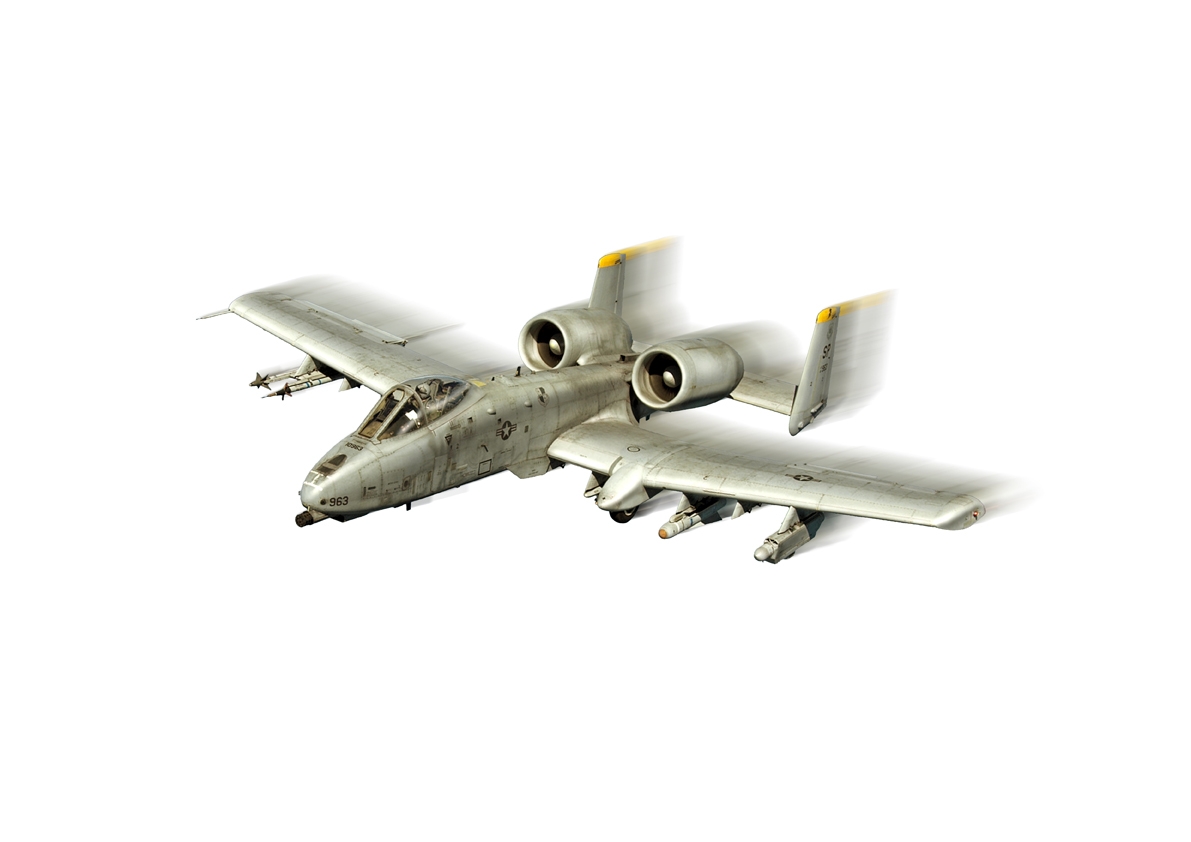
Step 7
Since the A-10 photograph I used, shows an aircraft more or less flying straight and level from the upper right to the lower left, I decide to portray this A-10 in a more dynamic setting. This means that my fast-moving Hog must be turned around a bit. So, I 'rotate canvas' at about 45 degrees CW (Clock Wise). Now it's flying diagonally upward from the lower right to upper left.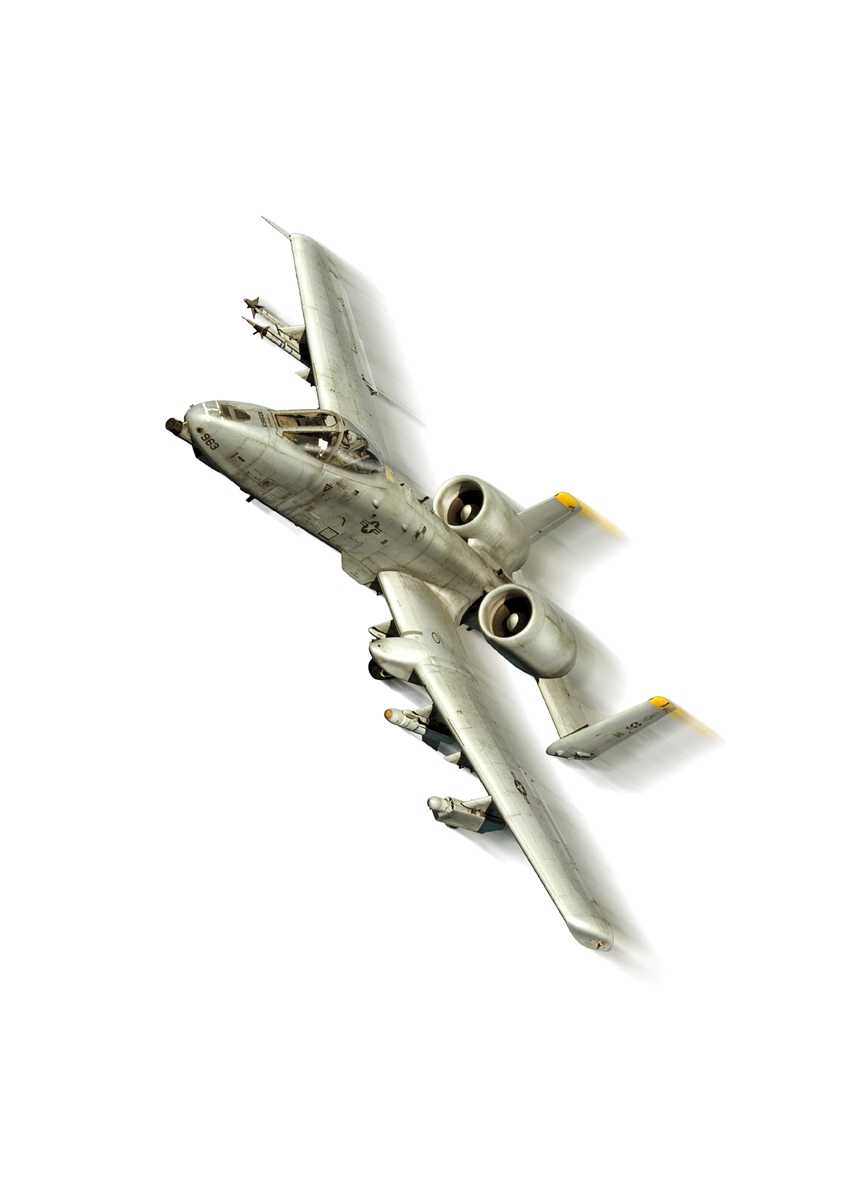
Step 8
I decided on a suitable background in the early stages and kept it on the shelf until I was done with the aircraft. It's now time to prepare that backdrop. I utilize an old composition of mine (A3 portrait size at 300 dpi). It's a piece of mountainous Nothern Spain, the homeland of my wife. I can already see a 'hill-hugging Hog' making its way through it at extreme low level in humid conditions. A Mediterranean Machynlleth Loop Area-like situation in the vertical, if you will. The background will require little less of the same filtering than the A-10 did.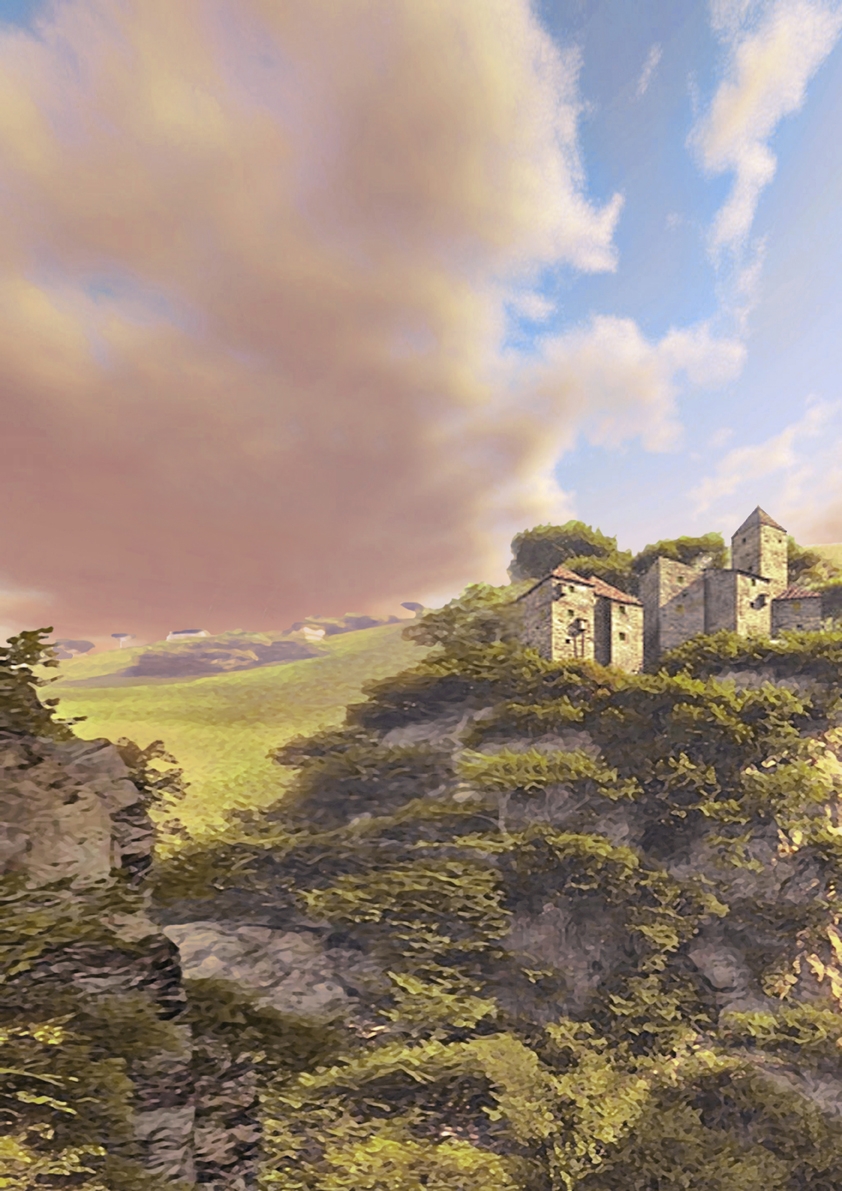
Step 9
First action is to drag in my moving Hog at its transparent layer into that background. Not doing anything from this point on would mean two separate images in one, not belonging together, a classic 'copy/paste' routine that tells the amateurs from the pros. We're not into that, we're trying to produce a convincing piece of digital art. So we go on...
Step 10
When an aircraft is moving fast past a backdrop and the spectator is following the plane by panning his eyes along, the background has to have a sense of motion, i.e. blur. Since I already decided that the A-10 will be in a tight climbing turn, a simple 'motion blur' for the backdrop is ruled out. In this case I go to 'radial blur', I click on 'zoom blur' and 'best'. I move the zoom centre all the way to the right and exactly half-way the vertical. I set the scale at 10px. It will take some time before the blur is in effect because this requires a lot of computer reckoning.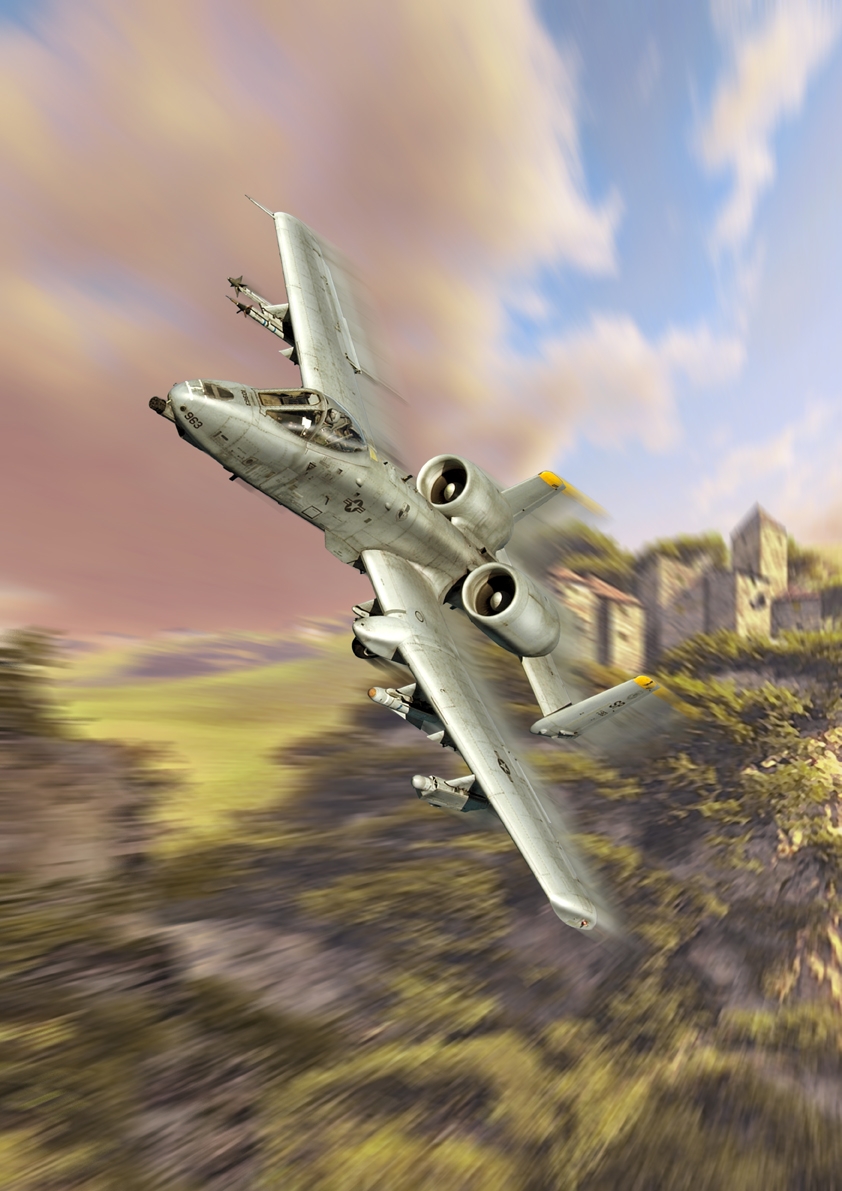
Step 11
Now the process of marrying aircraft and background begins in earnest. Especially all colour filters are used again to get both in unison. Contrasts, shadows, highlights of both are adjusted to get them in line. The A-10 starts blending into its background. I retain both as separate layers at this stage. Every now and then I experiment with 'hue/saturation', 'greening up' the background and saturating it a little.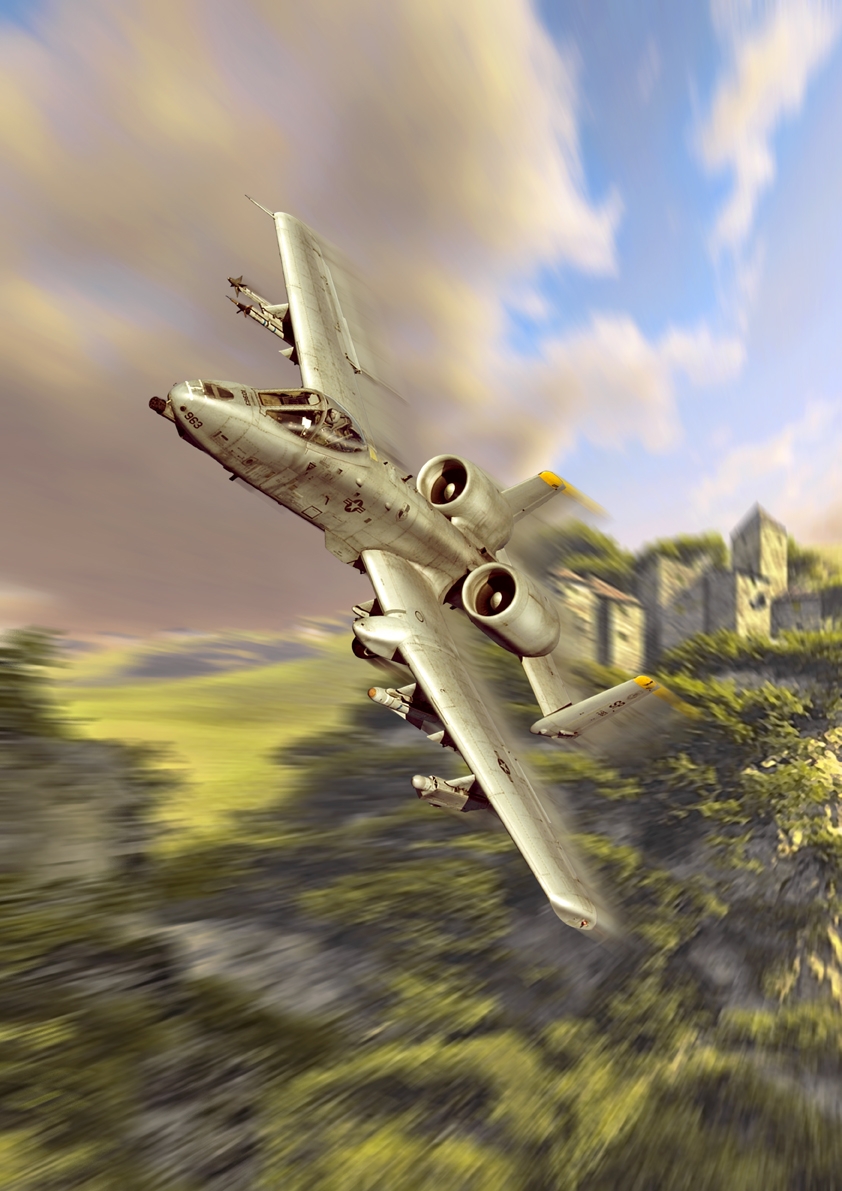
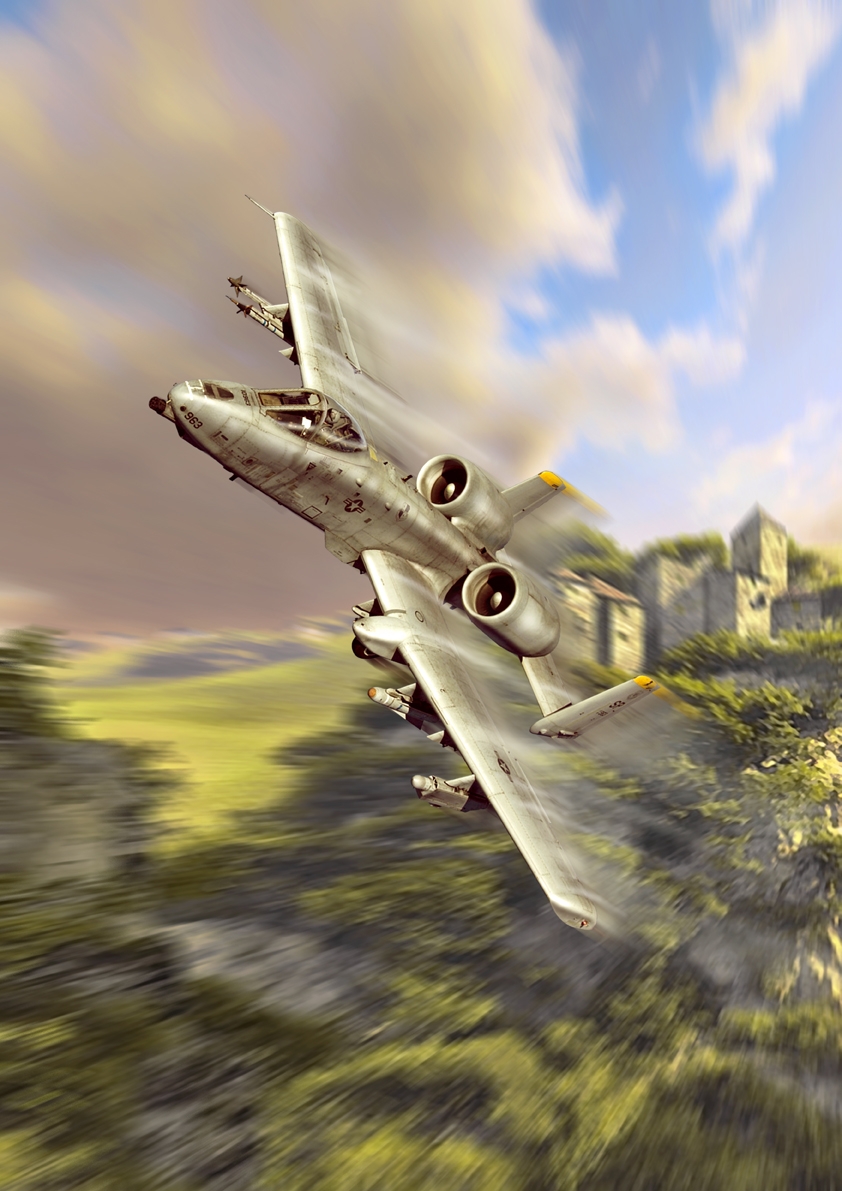
Step 12
Now it's time for the final stage, the 'icing on the cake'. I create a new transparent layer on top of and another one below the Hog. Using the colour white and soft-edged 'brush tool' set at either 25% opacity/25% flow or 10% opacity/10% flow and various diameters, I 'hand-paint' vortex trails and other humid-looking vapour effects on both layers, on top of and below the A-10's layer. Now the aircraft really cuts through the humid mountain air and the whole thing comes to life. Last stage consists of one more tour around the colour filters for final adjustments. The hardest part is knowing when to quit.