


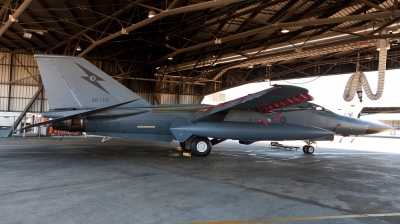
- Air Force: Australia - Air Force
- Aircraft: General Dynamics F-111C Aardvark
- Registration: A8-145 (cn D1-21)
- Views: 2014
- Location: Amberley (YAMB) , Australia - Queensland October, 2008

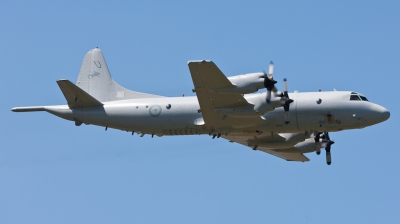
- Air Force: Australia - Air Force
- Aircraft: Lockheed P-3C Orion
- Registration: A9-757 (cn 285D-5676) Aircraft Info
- Views: 1213
- Location: Amberley (YAMB) , Australia - Queensland October 4, 2008
- Air Force: Australia - Air Force
- Aircraft: Lockheed P-3C Orion
- Registration: A9-757 (cn 285D-5676) Aircraft Info
- Views: 1303
- Location: Amberley (YAMB) , Australia - Queensland October 4, 2008
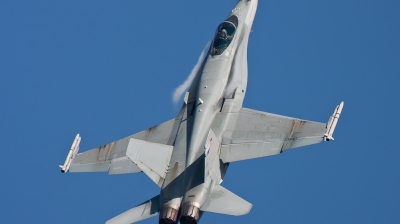
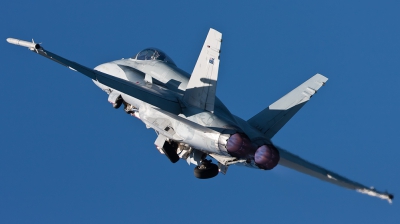
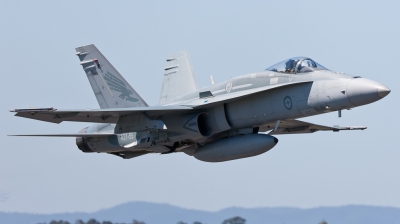
- Air Force: Australia - Air Force
- Aircraft: McDonnell Douglas F/A-18A Hornet
- Registration: A21-11 (cn 334/AF11) Aircraft Info
- Views: 1587
- Location: Amberley (YAMB) , Australia - Queensland October 4, 2008
RAAF F/A-18 Hornet Solo Display
- Air Force: Australia - Air Force
- Aircraft: McDonnell Douglas F/A-18A Hornet
- Registration: A21-11 (cn 334/AF11) Aircraft Info
- Views: 1298
- Location: Amberley (YAMB) , Australia - Queensland October 4, 2008
RAAF F/A-18 Hornet Solo Display
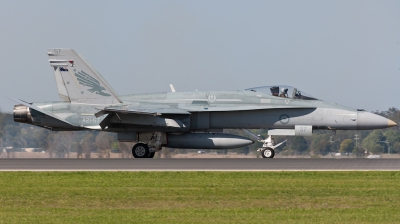
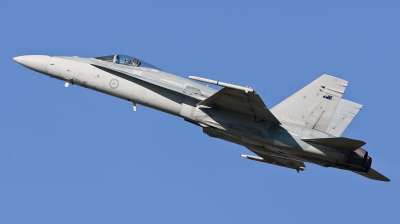
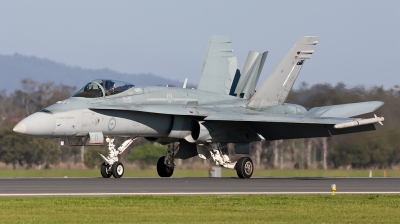
- Air Force: Australia - Air Force
- Aircraft: McDonnell Douglas F/A-18A Hornet
- Registration: A21-57 (cn 834/AF57) Aircraft Info
- Views: 1564
- Location: Amberley (YAMB) , Australia - Queensland October 5, 2008
3 Squadron markings, featuring the Southern Cross on the tail.

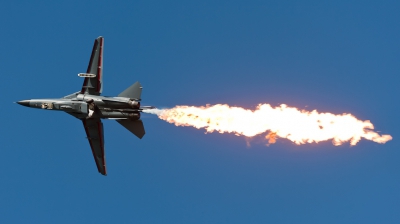
- Air Force: Australia - Air Force
- Aircraft: General Dynamics RF-111C Aardvark
- Registration: A8-126 (cn D1-02)
- Views: 2019
- Location: Amberley (YAMB) , Australia - Queensland October 5, 2008
the "Pig" doing its famous "dumb & burn" manouvre
- Air Force: Australia - Air Force
- Aircraft: General Dynamics RF-111C Aardvark
- Registration: A8-126 (cn D1-02)
- Views: 1989
- Location: Amberley (YAMB) , Australia - Queensland October 4, 2008

- Air Force: Australia - Air Force
- Aircraft: General Dynamics F-111G Aardvark
- Registration:
- Views: 1605
- Location: Katherine -Tindal AB (YPTN) , Australia - Northern Territory September 17, 2009
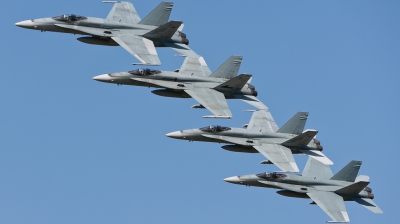
- Air Force: Australia - Air Force
- Aircraft: McDonnell Douglas F/A-18A Hornet
- Registration: A21-46 (cn 729/AF46) Aircraft Info
- Views: 1592
- Location: Amberley (YAMB) , Australia - Queensland October 5, 2008
4-ship demo flight of RAAF Hornets at the Amberley airshow.
- Air Force: Australia - Air Force
- Aircraft: McDonnell Douglas F/A-18A Hornet
- Registration: A21-11 (cn 334/AF11) Aircraft Info
- Views: 1521
- Location: Amberley (YAMB) , Australia - Queensland October 4, 2008
RAAF F/A-18 Hornet Solo Display
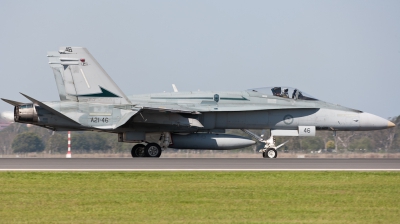
- Air Force: Australia - Air Force
- Aircraft: McDonnell Douglas F/A-18A Hornet
- Registration: A21-46 (cn 729/AF46) Aircraft Info
- Views: 1498
- Location: Amberley (YAMB) , Australia - Queensland October 5, 2008
- Air Force: Australia - Air Force
- Aircraft: McDonnell Douglas F/A-18A Hornet
- Registration: A21-11 (cn 334/AF11) Aircraft Info
- Views: 1401
- Location: Amberley (YAMB) , Australia - Queensland October 4, 2008
RAAF F/A-18 Hornet Solo Display

- Air Force: Australia - Air Force
- Aircraft: McDonnell Douglas F/A-18A Hornet
- Registration: A21-11 (cn 334/AF11) Aircraft Info
- Views: 1326
- Location: Amberley (YAMB) , Australia - Queensland October 4, 2008
RAAF F/A-18 Hornet Solo Display
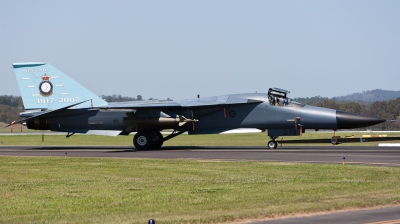
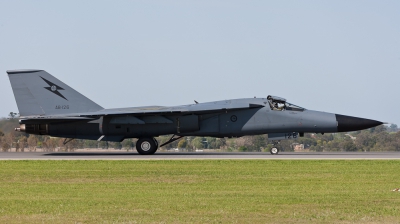
- Air Force: Australia - Air Force
- Aircraft: General Dynamics F-111C Aardvark
- Registration: A8-148 (cn D1-24)
- Views: 2118
- Location: Amberley (YAMB) , Australia - Queensland October 5, 2008
The 'G'-models have already been withdrawn from service within the RAAF at that time, but this wearing a special "90 years of 1. Sqn" tailart is being preserved at Amberley.
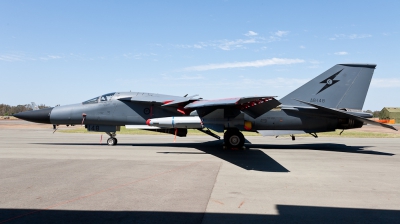
- Air Force: Australia - Air Force
- Aircraft: General Dynamics F-111C Aardvark
- Registration: A8-148 (cn D1-24)
- Views: 1728
- Location: Amberley (YAMB) , Australia - Queensland October 5, 2008
loaded with an AGM-142 Popeye stand-off missile.

- Air Force: Australia - Air Force
- Aircraft: McDonnell Douglas F/A-18A Hornet
- Registration: A21-57 (cn 834/AF57) Aircraft Info
- Views: 1595
- Location: Amberley (YAMB) , Australia - Queensland October 5, 2008
3 Squadron markings, featuring the Southern Cross on the tail.

- Air Force: Australia - Air Force
- Aircraft: McDonnell Douglas F/A-18A Hornet
- Registration: A21-57 (cn 834/AF57) Aircraft Info
- Views: 1556
- Location: Amberley (YAMB) , Australia - Queensland October 5, 2008
3 Squadron markings, featuring the Southern Cross on the tail.
- Air Force: Australia - Air Force
- Aircraft: McDonnell Douglas F/A-18A Hornet
- Registration: A21-55 / 55 (cn 814/AF55) Aircraft Info
- Views: 1898
- Location: Amberley (YAMB) , Australia - Queensland October 5, 2008
3 Squadron markings, featuring the Southern Cross on the tail.
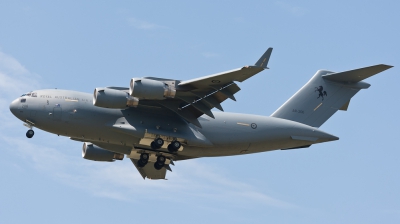
- Air Force: Australia - Air Force
- Aircraft: Boeing C-17A Globemaster III
- Registration: A41-206 (cn F166/AUS1) Aircraft Info
- Views: 1473
- Location: Amberley (YAMB) , Australia - Queensland October 4, 2008

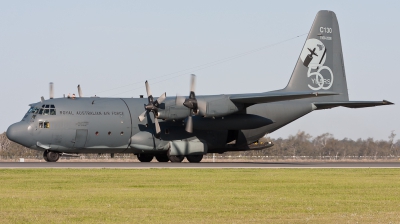
- Air Force: Australia - Air Force
- Aircraft: Lockheed C-130H Hercules (L-382)
- Registration: A97-008 (cn 382-4788) Aircraft Info
- Views: 1607
- Location: Amberley (YAMB) , Australia - Queensland October 4, 2008
tailart celebrating 50 years in RAAF service
- Air Force: Australia - Air Force
- Aircraft: Lockheed C-130H Hercules (L-382)
- Registration: A97-008 (cn 382-4788) Aircraft Info
- Views: 1802
- Location: Amberley (YAMB) , Australia - Queensland October 4, 2008
tailart celebrating 50 years in RAAF service
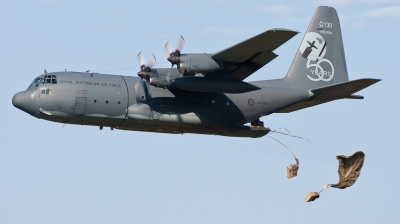
- Air Force: Australia - Air Force
- Aircraft: Lockheed C-130H Hercules (L-382)
- Registration: A97-008 (cn 382-4788) Aircraft Info
- Views: 2046
- Location: Amberley (YAMB) , Australia - Queensland October 4, 2008
cargo drop demonstration
- Air Force: Australia - Air Force
- Aircraft: General Dynamics RF-111C Aardvark
- Registration: A8-126 (cn D1-02)
- Views: 1713
- Location: Amberley (YAMB) , Australia - Queensland October 4, 2008
I think this gives a good impression how long the torch was during this spectacular demonstration